
In preparation for our Holiday Body Weight Challenge I have posted an awesome handstand tutorial from
?http://www.beastskills.com/the-handstand/
Don’t forget that this challenge starts Monday November 12th and continues through the new year!
You can see the rules of the challenge here: ?Click here!?
The feet
When you first start training, try to keep your toes pointed. Yes, this is mainly for aesthetics. You could still perform a handstand with hook feet, but I feel that when I straighten my toes it helps to line everything up. The feet point upwards; the body flows in that straight, upwards direction.
The legs
When you first begin, you will also find it easier to try and keep your legs straight and together. Keeping them straight will prevent them from flopping around like limp noodles, making things harder to control. Keeping them together will prevent them from flailing about as two different entities. You?ve got enough on your mind trying to coordinate the rest of your body. So help simplify things and keep those legs together for now!
The torso
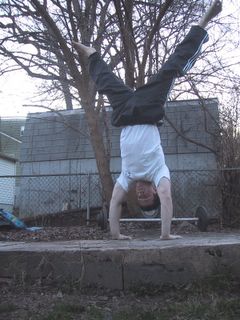
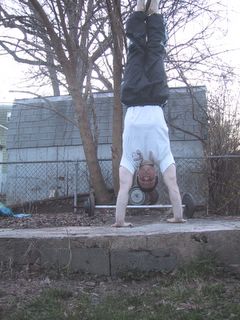
The torso is one of the major components that will determine the look of your handstand. As far as your torso is concerned, a straighter handstand is achieved by slightly tensing the abs to keep your body in line. You will get handstands like this:
?
 |
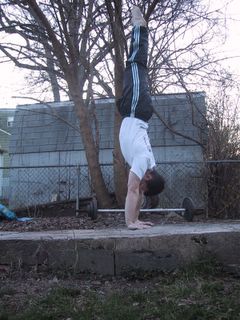 |
If you were to relax your abs a bit, let your torso and legs fall towards your backside, and bring out your head (discussed below) then you?d wind up with handstands like this:
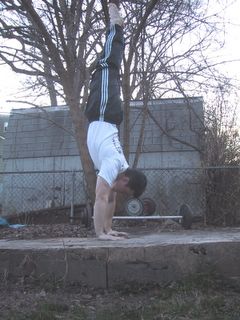 |
|
Gymnasts back in the day held handstands with this significant curve in their backs. For this reason, I?ll call this the ?old? style handstand.
As gymnastics changed, the handstand was straightened out for both aesthetic and technical reasons. The modern form allows harder, more complicated gymnastic skills to be performed.
The shoulders
You?ll want to really extend and engage the shoulders. This muscular tension will give you greater control. Think of shrugging your shoulders upwards or trying to push into the floor. The difference looks like this:
.jpg)
unshrugged

shrugged
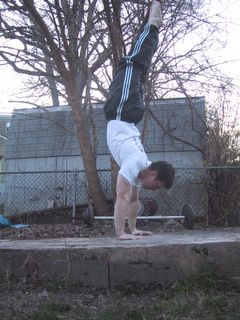
The head and arms
You?ll find your head position will be the single greatest factor affecting your back/handstand shape. Why is this? Because the spine follows the head. If you really pull your head out (to look at the ground), then your spine will follow suit and bend. This will give you that banana shape. Try and keep your head between your arms as much as you can. Instead of pulling your head out all the way out to stare at the ground, try to look upwards a bit with just your eyes. This will help to keep your head in and your back straight.
To those familiar with the Brazilian martial art known as Capoeira, the head is brought between the arms even more, so that a Capoeirista can watch his opponent, instead of the ground.
?
 |
 |
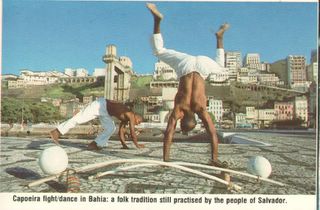
Two capoeiristas square off
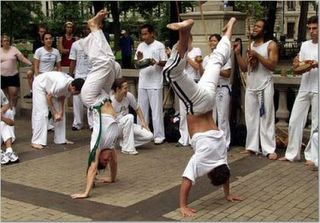
a neutral head position allows one to see their opponent.
So you?ve seen three styles of handstands ? modern, old, and capoeira. You may be asking yourself ?which is the best?? In the end, none are. They are simply different variations for different situations. Unless you?re in a Capoeira roda, or in front of Olympic judges, perform whichever one you want. I use each for different purposes myself.
That being said, I would still recommend that you learn all three. Each variation you try will help you better understand and control your handstand.
And as for the arms ? straight and shoulder width apart for now. Not much else to say about them.
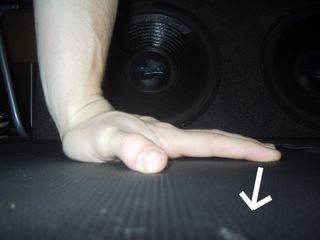
The Hands and Fingers
I place my hands on the ground like this:
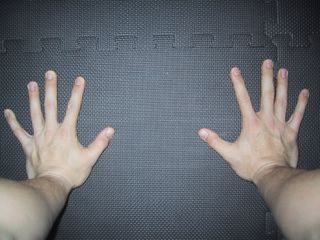
Keep your fingers spread out slightly and facing forwards. This is to allow for the greatest amount of control and stability in the handstand. The fingers are a huge part of controlling the handstand; something I?ll explain below.
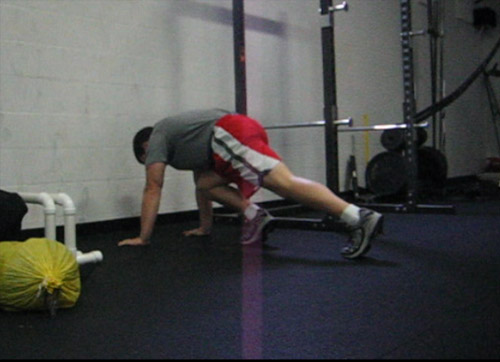
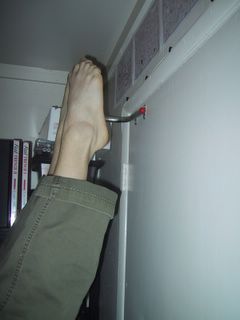
Training
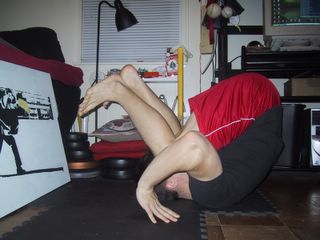
To start training for the handstand, get yourself a wall. You?ll be kicking up against the wall to get use to the handstand position. So put your hands down about a foot away from the wall and get your legs into the position shown below. It looks similar to a sprinter getting ready for the start of a race.
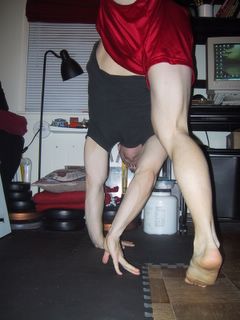
Now what you?re going to is take the leg that is straight and kick it up, heel first. Make sure to keep it straight, as this will generate more energy to lift your body up.
As your kicking leg goes up and over your head, the other leg that was bent should come up to join the kicking leg as both legs reach the wall. Try to do this so that your feet come to REST on the wall, not slam into it. This will start to teach you the right amount of force you need to kick up into a free standing handstand without kicking over.
?

Now that you?re in position, try to lightly tap your feet away from the wall into a free handstand. Like so:
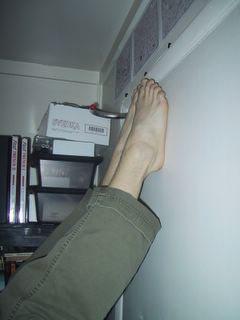
toes on the wall
toes off the wall, holding a handstand
If you fall back down to your feet, simply kick back up and try again. If you fall towards your back, the wall will catch you. It?s like having training wheels. Your back might be a bit arched at the moment, but this is something that can be adjusted later. For the now, you?re trying to bring your feet away from the wall and balance the position.
An important thing to remember is to keep your weight on your hands somewhere around the top of your palms and your first knuckles. I?ve illustrated below the general area where you want to keep your weight centered.
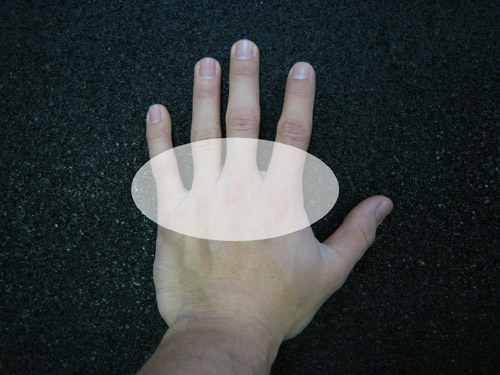
If you have to shift your balance at all, shift it towards your fingers (overbalancing). If you shift it to the heel of your hand (underbalancing), then you?ll often find you can?t shift the weight off the heel of the hand. The handstand will feel like it ?died? and will become more difficult to control. If you overbalance though, then you can still control yourself.
This leads us into the primary way to keep balance ? the fingers.
Like I mentioned before, your fingers are spread out to give you the most control. Here is where that control comes into play. With the handstand, you are most unstable in one plane ? front and back. When you start to feel like you are leaning towards your back (overbalancing), you should press your fingers into the ground and bring yourself back to the balance point described above.
Now your fingers don?t do all the work. Remember how I discussed keeping your toes straight, your legs together, and your abs tensed? Well, all this comes together now as you try to balance yourself. If you keep your body under a bit of tension, then your fingers can move this single unit back into a balanced position. If you let everything relax, then it?s like trying to stand cooked spaghetti on its end.
Continue tapping away from the wall in this manner until you?ve got a sense of how to correctly balance yourself. As I said, fingers play a huge role in balancing, but don?t forget your legs and midsection to help as well.
Away from the wall
Feeling good so far? Well then get the heck away from the wall! The sooner you drop the ?training wheels? the sooner you can develop a solid handstand.
For your first couple (read:hundred) handstands, you?ll want to find a relatively open area where you can land safely without kicking something.
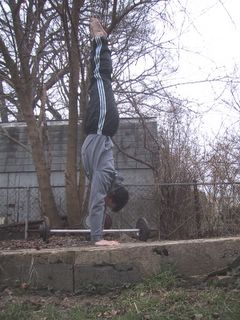
Ready? Do you remember how hard you need to kick? Well then, get into the previously described kicking position and get yourself inverted. If you haven?t fallen over yet then try to keep yourself upside-down for as long as you can. Feel free to walk around a bit if you need to get your balance.
If you?re walking around, your legs may split a bit, your back will probably be arching, and the whole thing in general will look ugly, but you?re in a handstand, and that?s what matters. Fighting to stay up as long as possible will help build up the strength and balance that you need.
If something goes wrong
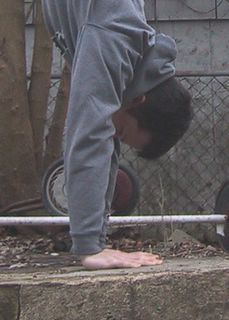
Other than ?falling into a heap?, there are two ways you?ll be getting out of a handstand when you start to fall towards your backside ? the roll and the pirouette.
The roll is simply a matter of tucking your chin to your chest, bending your arms slowly, coming down on your UPPER BACK and rolling forward. Please don?t piledrive your head into the ground. It?s just a simple forward roll out of danger.
When you start off, you?ll probably only want to do this where the ground is soft (a lawn) and where you have a bit of space (a lawn).
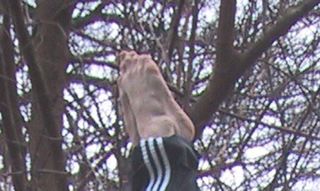
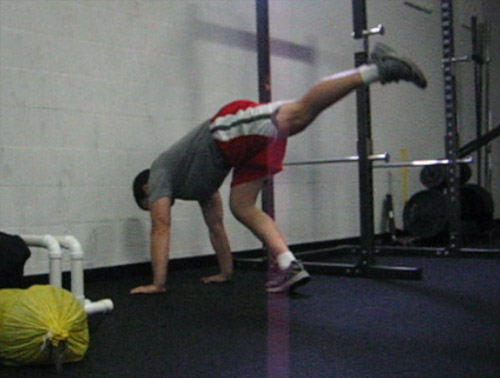
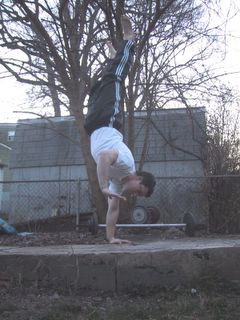
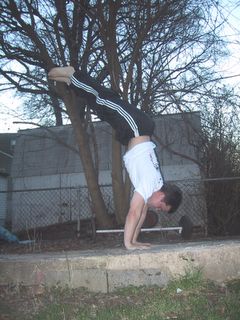
The second technique is the one I prefer ? the pirouette. Here, you?ll keep your arms straight throughout and turn your body 90 degrees out of danger. In this picture, I was in a handstand, and began to fall to my backside (the right of the photo).
Now imagine your hands are trying to turn a steering wheel 90 degrees, and turn your body off to the side. And just like you see in the picture, you?ll land on your feet, facing your hands. Is this move really that difficult? I don?t believe so. I hope I?m not confusing anyone or glossing over the topic. I think it?ll make sense to you when you start training.
Both these techniques are greatly preferred over slamming into the ground with a flat back, or trying to put your feet down and landing into a bridge. Trust me.
Saving the handstand
Now if controlling a handstand was like driving a car, the finger pressing and ab tensing, etc, would be the normal turns and micro-adjustments we make during a ride. The techniques below would be analogous to violently jerking the wheel from side to side.
Don?t even read this section until you?re handstand is starting to shape up into something you can work with. This is nothing you?re going to use regularly as your handstand gets solid, but I figure it?s useful to know when you are fighting to stay up.
First is a technique to save a handstand that?s falling to your feet (underbalanced). It?s a quick bend of the arms that will dip your shoulders and bodyweight forwards a bit, in hopes of saving things.

Please, oh please do not plow your face into the ground. If you don?t feel like your arms and shoulders can handle the load, then don?t do this. Just fall back to your feet and be no worse the wear.
This next technique is for when you begin to fall towards your backside. By quickly flexing and bending at the waist, you can hopefully shift your bodyweight back over your hands and save yourself.
Both techniques, as you can see, involve a rapid shift in bodyweight. You?ll want to develop a good handstand where you won?t need to do any of this violent wobbling around. But it?s always good to keep in the back of your mind, should the need arise.
So there you are folks, the handstand?
.jpg)
Best of luck with your training.
